This article is geared towards fabricating bent wood parts for sleighs and carriages. It will, for ease of illustration, use a runner on a "Portland-type" cutter, as an example. If you're going this commercially, or for museum quality results, you would need a large steam box (complicated and expensive), a high-pressure steam boiler (could blow up in your face) and some very complicated hyraulic bending equipment. But, if you had limited resources and just want to get the old cutter back in working order, read on.
First, is wood selection. I like ash or hickory, with white oak in a pinch. It must be straight-grained and know free. I suppose that in theory you can bend almost any wood. And if you are bent on driving yourself insane - go for it.
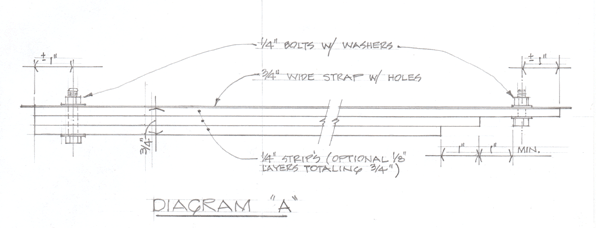
The runners on a cutter are usually about 3/4 inch square. So, if you can get rough sawn lumber, rip a 1 inch board (unplaned) into about 3/8 inch thick strips and 6 inches longer than the total runner length. I then plane them down to a strong 1/4 inch. If you don't have access to a planer, you can get by just ripping 1/4 inch strips. Now get some 3/4 inch wide strap at your local hardware store. I call it pipe hanger that comes in 10 ft lengths. This strap has closely spaced holes that will accommodate a 1/4 inch bolt. Now stack up 2 or 4 of these strips and bolt them and the strap together about 1 inch from the end. Bolt the strap to the other end and ONLY to the top layer. It will look like this:

The metal strip is the key element in the whole process. It is always on the outside of the bend. What it does is to prevent the wood on the outside of the curve from splitting and forces the wood on the inside to compress. Because we have thin strips, the inside layer can essentially slide along each other rather than compress. The outer layer prevents splitting.
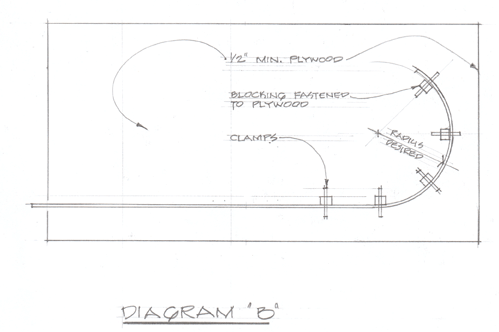
Now get a hunk of pipe or conduit with one end capped. This must be large enough in diameter to fit the runner and long enough to impress the "to be bent" portion. Fill it up with water and soak overnight. Put the capped end on a heat source and wait for about 1/2 hour. Now put on the gloves and clamp to your form. Start the bend at the end where the bolt goes through all three layers. Clamp the end and be quick about bending it around the form. Don't let the wood cool too much and you'll be surprised how easy it is to bend with good steady pressure. It will look something like this:

Let it dry for a few days and then take the clamps and strap off and glue the layers together. There are any number of water proof or resistant glues available. Epoxys are great but Tite Bond II will do for most users. Clamp back in place. Remember we had 1 inch wide strip for a 3/4 inch wide runner. Why? If the edges don't line up perfectly, you can even them up with a planer or joiner. That's basically it.
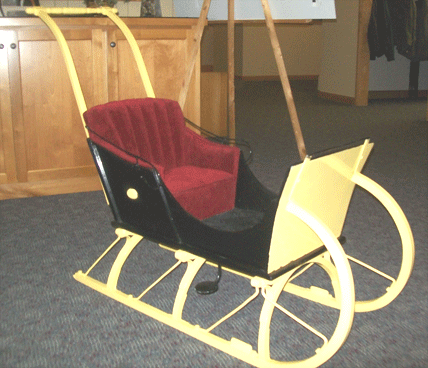
About the form: be imaginative. The little child's sleigh, featured below, has a lot of bent components. I used an old 20 inch bicycle wheel (minus tube and tire) for it. If you have an "S" shaped piece, be sure to bolt the metal at the transition point, putting the metal on the outside of the curve.

Child's Push-type Portland Cutter
Good luck. This method will give you a member that is stronger than solid wood and will hold its shape. And, it's a lot old easier than the old-fashioned way. |

